

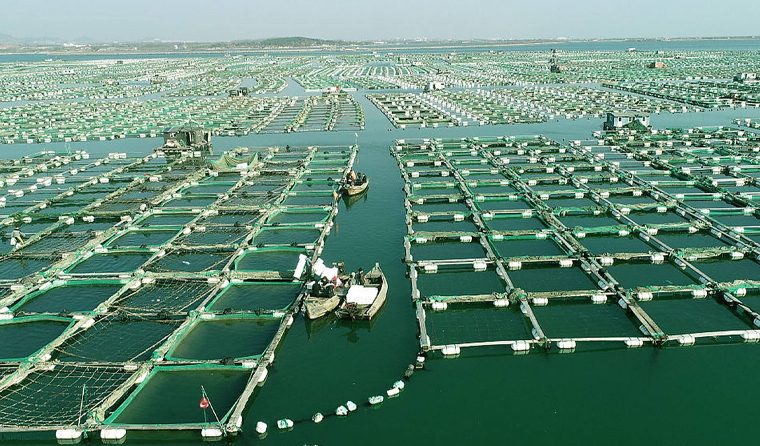
The installation quality of underwater aquaculture cameras directly determines their monitoring effect and service life. A standardized installation process enables the equipment to operate stably in complex aquaculture environments and accurately capture fish behavior and underwater environmental information. Installation must be closely aligned with the characteristics of different scenarios such as ponds, cages, and industrial aquaculture tanks, and proceed in an orderly manner around the three core requirements of fixing stability, waterproof sealing, and viewing coverage.
Preparation before installation is the foundation for ensuring installation quality, and it is necessary to first clarify requirements and on-site conditions. First, determine the installation position and quantity of cameras according to the size, shape, and monitoring focus of the aquaculture area—for example, ponds need to be deployed separately at the water inlet, water outlet, and central area to eliminate monitoring blind spots; cage aquaculture requires installation around the cage and at the bottom to achieve 360-degree monitoring. Secondly, check whether equipment accessories are complete one by one, including underwater aquaculture camera main body, stainless steel bracket, waterproof cable, sealing rubber ring, fixing bolt, and tools such as wrench, screwdriver, and waterproof tape. At the same time, it is necessary to confirm that the camera's IP68 or higher waterproof rating and pressure resistance performance match the actual aquaculture water depth to avoid failures after installation due to mismatched parameters. In addition, it is necessary to plan the cable routing path in advance, avoiding areas with frequent aquaculture operations and locations prone to collision to ensure safe and hidden wiring.
In pond aquaculture scenarios, underwater aquaculture cameras mainly use bracket fixing as the installation method. If shore installation is chosen, it is necessary to first compact the foundation or pour a concrete base at the edge of the pond, fix the stainless steel bracket vertically on the base, adjust the bracket height according to water level changes, and ensure that the camera lens is completely submerged in water and aligned with the monitoring target; if installation in the center of the pond is required, floating bracket or cement pier fixing bracket can be used—floating type needs to be matched with plastic floats with sufficient buoyancy, fix the camera on the bracket under the float, and then fix the float position with anchor chain; cement pier type requires prefabricating cement piers of moderate weight, firmly connecting the bracket with the pier body, sinking it to the bottom of the pond, and adjusting the angle to align with the fish-intensive area. During installation, the connection between the camera and the bracket must be fastened with anti-rust bolts, a sealing rubber ring must be added at the interface and waterproof sealant applied; the waterproof cable must be threaded through the inside of the bracket, and the connection with the camera must be wrapped with waterproof tape in multiple layers and then covered with a waterproof protective sleeve to enhance the sealing effect.
Installation for cage aquaculture needs to adapt to the flexible structure of the cage, with hoisting type and net frame fixing type commonly used. For hoisting installation, fix pulleys or hooks on the steel frame at the top of the cage, use high-strength nylon rope or stainless steel cable to hang the camera to a suitable height inside the cage, the length of the rope can be adjusted according to the water level, and lead blocks are hung at the bottom to maintain stability; for net frame fixing type, small brackets are welded or bolted to the metal frame of the cage, and the camera is directly installed on it with the lens facing the inside of the cage. Both methods need to ensure that the camera maintains a distance of 1-2 meters from the cage netting to prevent friction damage or lens blocking; the cable must be fixed with cable ties along the cage frame, and the end connected to the control box or power supply on the water surface to ensure stable transmission.
Industrial aquaculture tanks are mostly fixed tanks made of cement or FRP, and underwater aquaculture cameras can be installed in embedded or wall-mounted ways. Embedded installation requires reserving an installation hole matching the size of the camera in the tank wall, laying a waterproof sleeve in the hole, embedding the camera and fixing it with bolts, and filling the gap with waterproof sealant at the edge to reduce interference with aquaculture operations; wall-mounted installation directly drills holes in the tank wall, fixes the bracket with expansion bolts, then installs the camera and adjusts the angle to cover the entire aquaculture tank. For multi-layer aquaculture tanks, multiple cameras can be installed in layers to monitor fish in different water layers respectively. In addition, in industrial aquaculture, cameras are often linked with water quality monitoring sensors and automatic feeding equipment, so sufficient space and interfaces need to be reserved during installation to ensure coordinated operation of equipment.
Debugging and fixing inspection after installation are essential. First, turn on the power, check the real-time picture through the control terminal, adjust the lens angle and focal length to ensure that the field of view covers the target and the picture is clear; if the picture is blurred, timely clean the lens stains and re-debug. Secondly, conduct waterproof performance test, observe for 24 hours after installation, check whether there are water seepage marks on the equipment shell and cable interface, and confirm that the equipment has no short circuit, crash and other problems. Finally, check the fixing stability, gently push the camera and bracket to confirm no looseness, and re-reinforce the rope or anchor chain for easy-shaking scenarios.
Daily maintenance and regular inspection need to be followed up simultaneously: regularly clean algae, sludge and other attachments on the lens surface; check whether the cable is damaged or aged, and replace damaged parts in time; adjust the installation height and angle according to seasonal water level changes. Before operations such as pond cleaning and net replacement, the camera must be removed and properly stored, and redeployed according to the original process after the operation is completed to avoid equipment damage.
For more information about underwater aquaculture camera, please visit the homepage.


