Cleaning Methods for Underwater Aquaculture Cameras
Hits: 1132 Time: August 30,2025
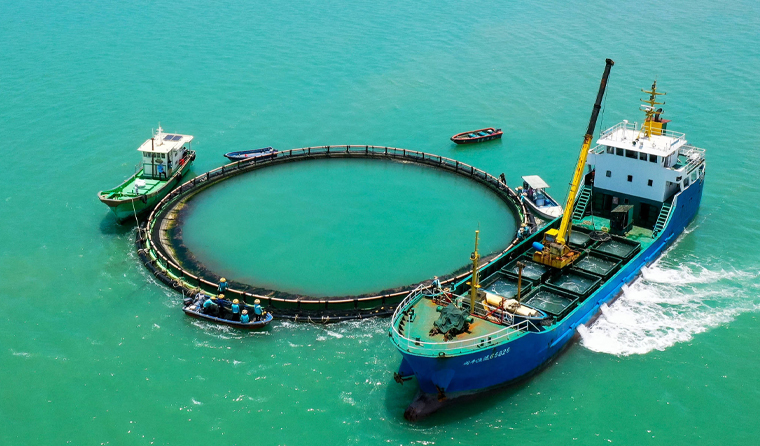
underwater aquaculture camera operate in complex aquatic environments such as seawater and freshwater for long periods, and are prone to adhering to biological fouling (e.g., algae, larval shellfish), silt, and mineral deposits. If not cleaned in a timely manner, these substances will severely affect lens light transmittance and equipment performance. Therefore, scientific cleaning methods should be followed, with specific steps as below:
-
Power Off and Remove the Device: First, disconnect the camera's power supply and data cables to avoid electric shock or equipment short circuit during cleaning. Then, remove the camera from the water using a dedicated hoisting or disassembly device. Handle it gently to prevent collision with the lens or damage to the sealing structure.
-
Prepare Cleaning Tools and Supplies: Prepare soft cleaning tools (such as lint-free microfiber cloths, special lens cleaning cotton, and soft-bristled brushes; avoid rough rags or hard-bristled brushes to prevent scratching the lens coating), neutral cleaning agents (such as medical pure water and special lens cleaners; do not use strong acids, alkalis, or corrosive agents containing alcohol, which may damage the lens coating and equipment sealant), and a dedicated container for holding the cleaning solution.
-
Preliminary Removal of Surface Dust and Loose Dirt: First, use a soft-bristled brush to gently sweep away loose impurities such as dry sediment and floating algae from the surfaces of the camera lens and transparent protective cover. Avoid direct wiping to prevent scratches caused by dirt.
-
Wiping with Neutral Solution: Dip a microfiber cloth in a small amount of medical pure water or special lens cleaner (wring it until it is semi-dry, without dripping), and gently wipe in a circular motion clockwise or counterclockwise starting from the center of the lens. Apply even and gentle force, and avoid rubbing the same area repeatedly. For stubborn stains (e.g., a small amount of attached algae), cover the stain with the cleaning cloth and let it sit for 10-20 seconds to soften the stain before gently wiping. Do not scrape hard.
-
Drying Treatment: After cleaning, use a dry microfiber cloth to gently wipe the lens and protective cover again to remove residual moisture and prevent water stains from forming after drying. In high-humidity environments, use an oil-free compressed air blower (e.g., a camera-specific air blower) to gently blow away surface moisture, avoiding water seepage into the device.
-
Camera Body Cleaning: Wipe the surface of the camera body with a soft cloth dipped in medical pure water to remove attached silt and water stains. Focus on cleaning the dirt around the body interfaces (e.g., power interface, data interface) to prevent poor contact. For metal parts on the body, after cleaning, gently apply a layer of special anti-rust agent (ensure the anti-rust agent does not corrode the device shell material) to avoid seawater corrosion.
-
Connecting Cable Cleaning: Wipe the connecting cables gently along their length with a soft cloth dipped in a small amount of neutral cleaner to remove surface oil and sediment. After cleaning, check if the outer sheath of the cables is damaged. If damaged, replace them in a timely manner to prevent water from seeping into the internal wires and causing a short circuit.
During cleaning, simultaneously inspect the sealing components of the camera, such as O-rings and gaskets. If dirt adheres to the seals, gently wipe them clean with a cloth dipped in pure water to avoid dirt affecting the sealing performance. At the same time, check if the seals are aged, deformed, or cracked. If problems exist, replace them promptly to prevent water leakage when the camera is re-submerged after cleaning.
-
Function Test: After cleaning, connect the power supply in a land environment first. Check if the camera's lens imaging is clear (no blurriness or residual stains), if the lights (if any) work normally, and if data transmission is stable. Only after confirming that the device functions properly, proceed with underwater reset.
-
Reinstallation: Reinstall the camera to the designated underwater position in accordance with the equipment manual. Ensure the hoisting is secure and the connecting cable interfaces are well-sealed (special waterproof tape can be wrapped around the interfaces to enhance sealing). Avoid equipment falling off or water leakage due to improper installation.
-
Seawater Cage Aquaculture Scenarios: Due to the high eutrophication level of seawater and fast biological fouling rate, cleaning is recommended once every 1-2 weeks. In summer, when water temperature is high and algae grow vigorously, the frequency can be shortened to once every 3-5 days.
-
Freshwater Aquaculture Scenarios: Freshwater contains relatively fewer impurities, so cleaning can be done once every 2-4 weeks. For turbid aquaculture water (e.g., pond aquaculture), the cleaning frequency should be appropriately increased based on the lens contamination.
For more information about underwater aquaculture camera, please visit the homepage.